When it comes to environmental mitigation, vapor barriers are a critical line of defense. But even the best materials are only as good as their installation. The most common vapor barrier installation mistakes often stem from overlooking details on the job site, leading to compromised systems and project headaches. Getting it right the first time means understanding where things typically go wrong and having a plan to execute flawlessly.
The High Cost of Cutting Corners: Why Proper Installation Matters
In construction, time is money, and rework costs both. A vapor barrier system that fails to perform due to poor installation can lead to significant delays, increased remediation costs, and potential health risks. We’re talking about protecting structures from moisture, methane, and radon – not a place for “good enough.” Robust installation isn’t just about meeting code; it’s about delivering a reliable, long-term solution. When schedules are tight, a botched installation means project slowdowns and budget overruns.
Overlooked Subgrade Preparation
One of the most frequent points of failure begins before the barrier even touches the ground: inadequate subgrade preparation.
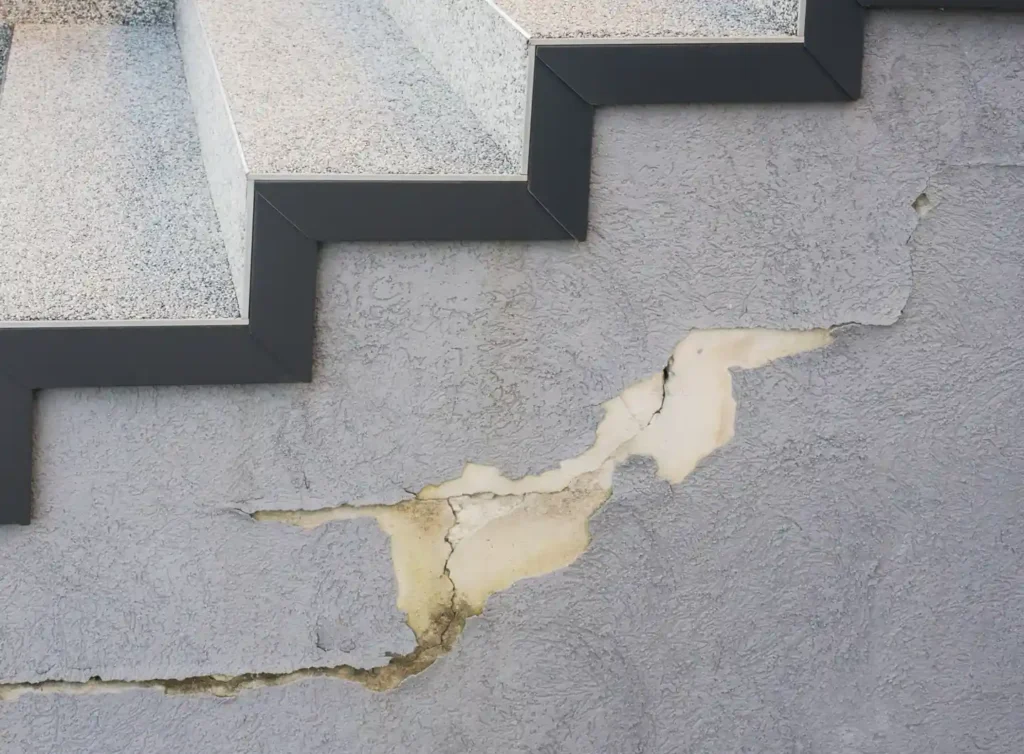
- The Mistake: Uneven surfaces, debris (rocks, rebar, construction waste), or standing water. These create stress points, punctures, or adhesion issues.
- The Fix: A clean, smooth, and dry subgrade is non-negotiable. This means compacting soil, removing all sharp objects, and ensuring proper drainage. Any irregularities should be filled and leveled. It’s foundational work; you can’t build a reliable system on a shaky base.
Improper Overlaps and Sealing
The integrity of a vapor barrier system hinges on continuous coverage. Gaps are vulnerabilities.
- The Mistake: Insufficient overlap between barrier sections, or poor adhesion of sealing tapes and mastic. This creates pathways for gas and moisture intrusion.
- The Fix: Adhere strictly to manufacturer specifications for overlap, typically 6-12 inches. Use only approved tapes and sealing compounds, applying them to clean, dry surfaces with firm, consistent pressure. Don’t skimp on the tape; it’s the glue holding your protection together. Pay extra attention around penetrations and changes in elevation where these issues are most common.
Penetrations and Transitions: The Weakest Links
Building envelopes are rarely simple, flat surfaces. Columns, pipes, and utility conduits create unavoidable interruptions in the barrier system, which are prime locations for leaks if not handled with precision.
Detailing Around Columns and Pipes
- The Mistake: Rushing through the detailing around structural supports or utility lines, leading to shoddy cuts, inadequate seals, or insufficient boots/collars.
- The Fix: Use pre-manufactured boots or carefully cut and seal custom patches with appropriate mastic and tape. The goal is a continuous, airtight seal around every penetration. This often requires multiple layers and careful attention to detail. It’s craftsmanship, not just laying material. Certified crews understand these nuances and execute with precision, ensuring every penetration is treated as a potential weak point until properly sealed.
Wall Transitions and Foundation Interfaces
- The Mistake: Failing to properly integrate the sub-slab barrier with vertical wall membranes or foundation components. This creates a bypass route for contaminants.
- The Fix: Extend the sub-slab barrier up the foundation walls, securing it mechanically and sealing it meticulously. Coordinate with other trades to ensure that subsequent construction activities don’t compromise these critical transition points. This requires foresight and communication, ensuring the barrier system integrates seamlessly with the full building structure.
Post-Installation Care and Quality Control
Even after a perfect installation, the job isn’t over. The construction site is dynamic, and ongoing activities can easily damage a newly installed barrier.
Damage During Construction
- The Mistake: Allowing subsequent trades or equipment to puncture, tear, or displace the installed barrier before it’s protected by concrete or other finishes.
- The Fix: Implement protective layers immediately after installation, such as a sacrificial layer of geotextile or plywood. Clearly mark the protected area and educate all site personnel on the importance of the barrier. Conduct regular site inspections to identify and repair any damage promptly. A small tear today is a major problem tomorrow if left unaddressed.
Inadequate Quality Assurance and Testing
- The Mistake: Skipping or rushing essential quality control checks and post-installation testing. Without verification, you’re just guessing.
- The Fix: Implement a rigorous QA/QC plan. This includes visual inspections of all seams, overlaps, and penetrations. For critical applications, consider smoke testing or pressure testing to verify system integrity. Document everything. This isn’t optional; it’s a non-negotiable step to confirm the barrier system is performing as designed.
Build It Right, Built to Last
Avoiding vapor barrier installation mistakes isn’t about luck; it’s about disciplined execution and an installation-first mindset. It means having a crew that understands the stakes, works with precision, and isn’t afraid to get dirty to ensure the job is done right. When you’re facing tight deadlines and complex sites, there’s no room for error. You need a partner that shows up, gets the job done, and leaves you with a reliable, long-lasting barrier system. That’s the kind of operational agility and focused expertise that ensures your project stays on schedule and your environmental mitigation goals are met, without compromise.